Creating your own blog site can be a great way to share your ideas and experiences with the world. When I got an idea to make my own small web-site for sharing some blog sites, I originally wanted to have some very lightweight, easy to maintain and preferably free to host solution. Of cause there are bloging platforms that can be utilized, but I wanted something self-hosted, just because.
After some research found Hugo - static site generator. Simple usecase after setting up is:
- write post using Markdown
- publish
And that’s all. Markdown text is converted into static pages, that results in very fast web-site. No need to maintain backend, database or learn any CMS tutorials. Big plus is a vast amount of themes available. And that is how this web-site is done.
Prerequisites Link to heading
Before we begin, you will need to make sure that you have the following:
- A basic understanding of Git
- A Git repository (either on GitLab or GitHub)
- A domain name that you own and control
- Basic knowledge of CloudFlare
- Basic knowledge of Markdown syntax
Step 0 - Preparation Link to heading
To start developing your new web-site, you need to install Hugo on your dev machine.
Before installing Hugo, you need to ensure that your system meets the minimum requirements. Hugo is a cross-platform tool, so it can be installed on Windows, macOS, or Linux.
For Windows, you need to have Windows 7 or newer. For macOS, you need to have macOS 10.11 or newer. For Linux, you need to have a 64-bit version of one of the following distributions:
- Debian
- Ubuntu
- Fedora
- CentOS
- openSUSE
Download the appropriate binary for your operating system and architecture from Hugo. Installation. For example, if you are using macOS on an Intel-based machine, you would download the hugo_X.Y.Z_macOS-64bit.tar.gz file.
After downloading the Hugo binary, extract the contents of the file to a directory on your local machine. Add Hugo bin folder into PATH.
And finally verify Hugo installation:
hugo version
This should output the version of Hugo that you just installed.
Step 1 - Initiate a new website project Link to heading
Once you have Hugo installed, run the following command in your terminal:
hugo new site my-blog-site
This command will create a new Hugo site in a directory named my-blog-site. Navigate to this directory.
Next, you will need to choose a Hugo theme for your blog site. Hugo provides a number of built-in themes that you can use, or you can download a custom theme from the Hugo Themes website. To add a theme to your site, you will need to download it to the themes directory of your site. For example, to add hugo-coder theme to your site, run the following command:
git submodule add https://github.com/luizdepra/hugo-coder themes/hugo-coder
Now that you have a theme installed, you can customize the configuration of your site by editing the config.toml file in the root directory of your site. This file contains all the basic configuration options for your site, such as the title, description, and theme. It can be usefull to check Git repository for the selected theme on suggested configuration. For example, place this into config.toml:
baseurl = "http://site.my"
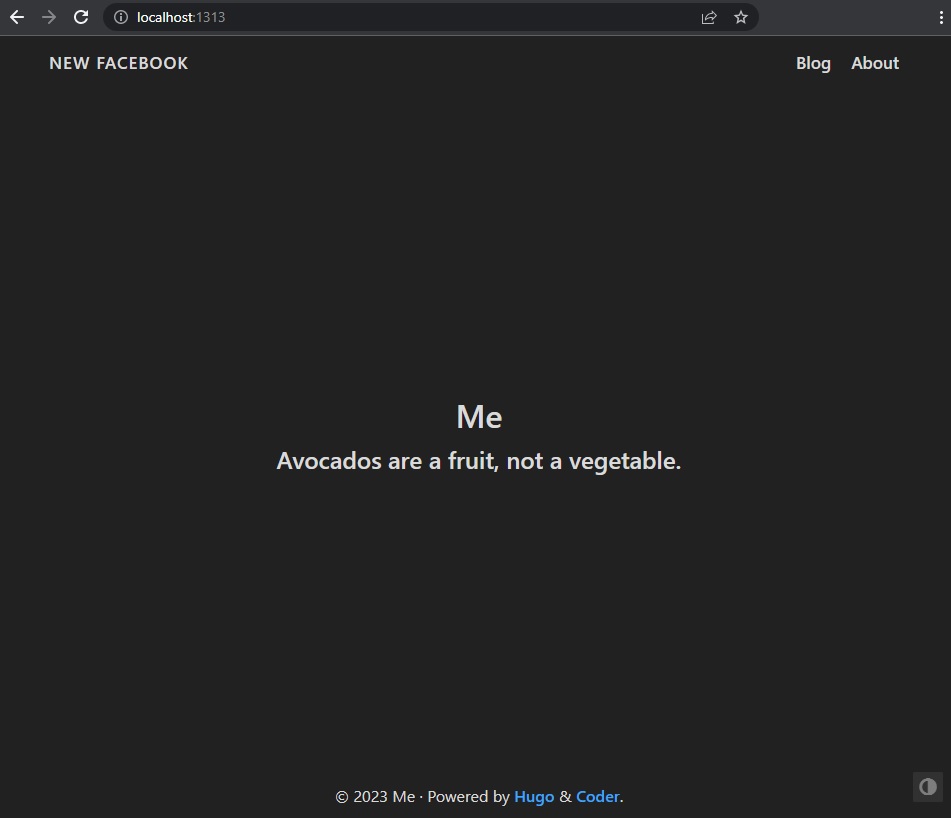
title = "New Facebook"
theme = "hugo-coder"
languagecode = "en"
defaultcontentlanguage = "en"
paginate = 20
[markup.highlight]
style = "github-dark"
[sitemap]
changefreq = 'weekly'
filename = 'sitemap.xml'
priority = 0.5
[params]
author = "Me"
info = "Avocados are a fruit, not a vegetable."
description = "They're technically considered a single-seeded berry, believe it or not."
keywords = "blog,personal"
#avatarurl = "img/avatar.jpg"
#gravatar = "[email protected]"
favicon_32 = "/img/favicon-32x32.png"
favicon_16 = "/img/favicon-16x16.png"
#since = 2020
enableTwemoji = true
colorScheme = "auto"
hidecolorschemetoggle = false
[taxonomies]
category = "categories"
series = "series"
tag = "tags"
author = "authors"
# Social links
# Menu links
[[menu.main]]
name = "Blog"
weight = 1
url = "posts/"
[[menu.main]]
name = "About"
weight = 2
url = "about/"
At this moment you can check how the website look like:
hugo server
This command will start Hugo dev server and publish web-site on http://localhost:1313.
Step 2 - Add content Link to heading
At this moment there is no any posts on the site. New posts and pages are expected to go under content/ directory. If you will check tail of config.toml file, there is a definition of 2 menus Blog and About, that lead to posts/ and about/. That should be folders under content root. So the expected structure would be
my-web-site
    |-...
    |- content
        |-posts
            |-my-first-post.md
        |-about.md
There will be multiple blog posts and only 1 page with about information.
Add about page Link to heading
Initiate a new content page:
hugo new about.md
Write down some information, set draft to false:
+++
title: "About"
date: 2023-05-01T11:07:41+03:00
draft: false
+++

# I am banana
Add first blog post Link to heading
Create a file content/posts.md. It is needed to let Hugo know that there is something under posts directory to be processed:
+++
title = "Posts"
slug = "posts"
+++
No need to add anything else here, if you do not want of cause…
Initiate a new blog post:
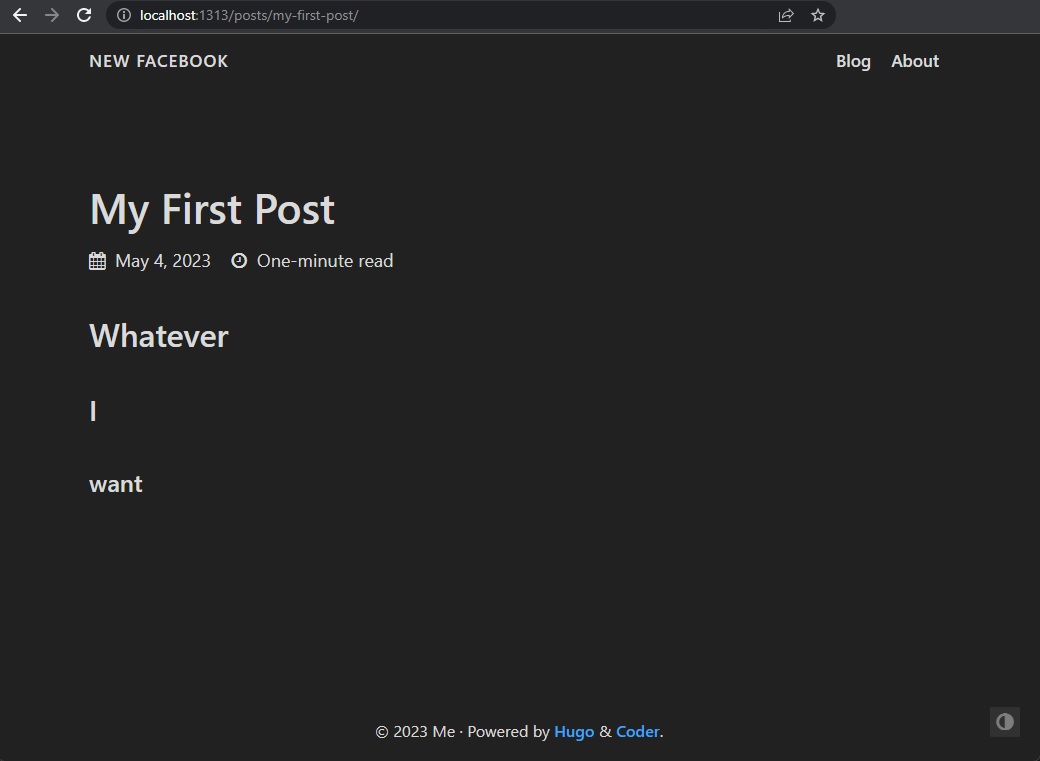
hugo new posts/my-first-post.md
Open generated file and write whatever you want using Markdown syntax. Define title and change draft value to false. As a result it can look like:
+++
draft = false
date = 2023-05-01T10:57:26+03:00
title = "My First Post"
description = ""
slug = ""
authors = []
tags = []
categories = []
externalLink = ""
series = []
+++

# Whatever
## I
### want
When done, start Hugo dev server:
hugo server
Step 3 - Publish web-site to Git Link to heading
By this moment web-site root folder should be already initialized with git. Add the remote on your choice and push project. For example, in case of GitLab:
git remote add origin [email protected]:<your-gitlab-username>/<your-gitlab-project-name>.git
git add .
git commit -m "My site init"
git push
Step 4 - Deploy web-site on Cloudflare Pages Link to heading
Cloudflare Pages is a free static site hosting service that integrates with your Cloudflare account. If you don’t already have a Cloudflare account, you’ll need to create one. Head over to https://www.cloudflare.com/ and sign up for an account.
Once you’ve created your Cloudflare account, you’ll need to add your website to Cloudflare. To do this, click on the “Add a Site” button and enter your website’s domain name. Follow the prompts to verify your website’s DNS records.
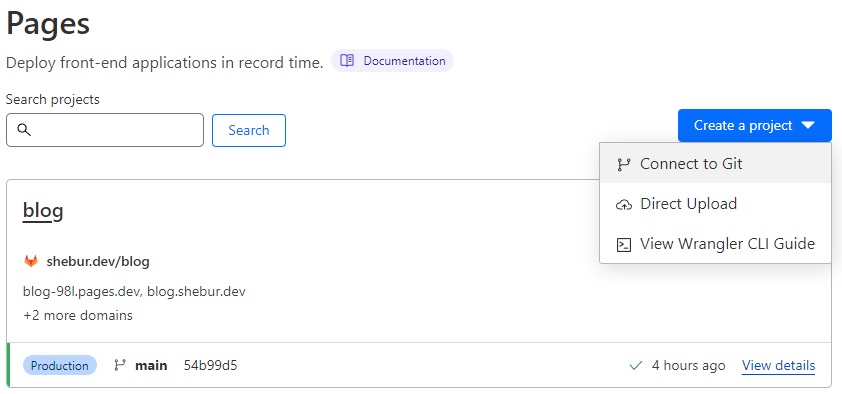
Enable Cloudflare Pages. Click on the “Pages” tab in your Cloudflare dashboard and click on the “Get Started” button.
Create a new project under Pages and connect it to git repository.
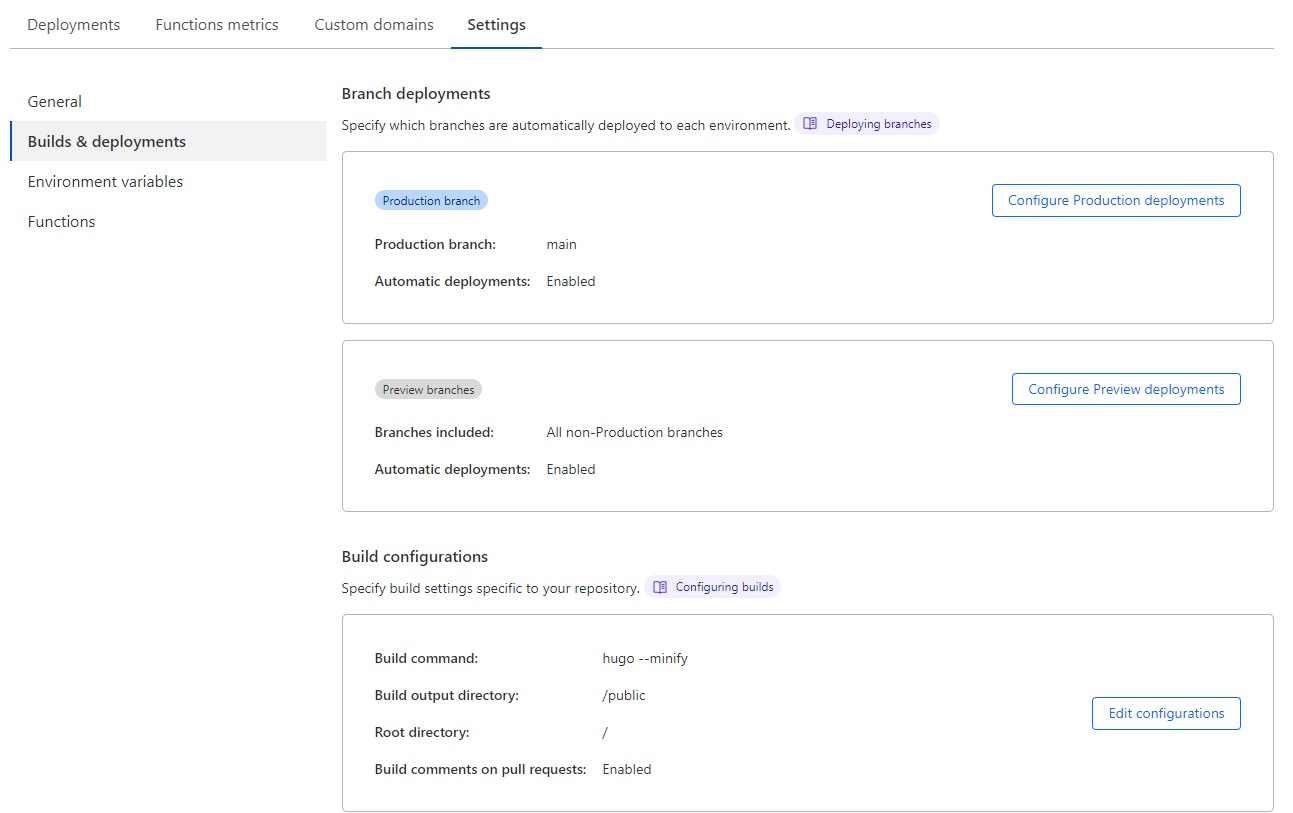
Once you’ve connected your repository, you’ll need to configure your build settings. Choose “Hugo” as your build preset and enter the build command:
hugo --minify
This will build your Hugo website and minify your CSS and JavaScript files for optimal performance.
Now that you’ve configured your build settings, you can deploy your Hugo website to Cloudflare Pages. Click on the “Deploy Site” button to deploy your website.
Now whenerever you push something to the git with your web-site, Cloudflare will fetch it, build and publish pages.
Step 5 - Assign DNS record to your web-site Link to heading
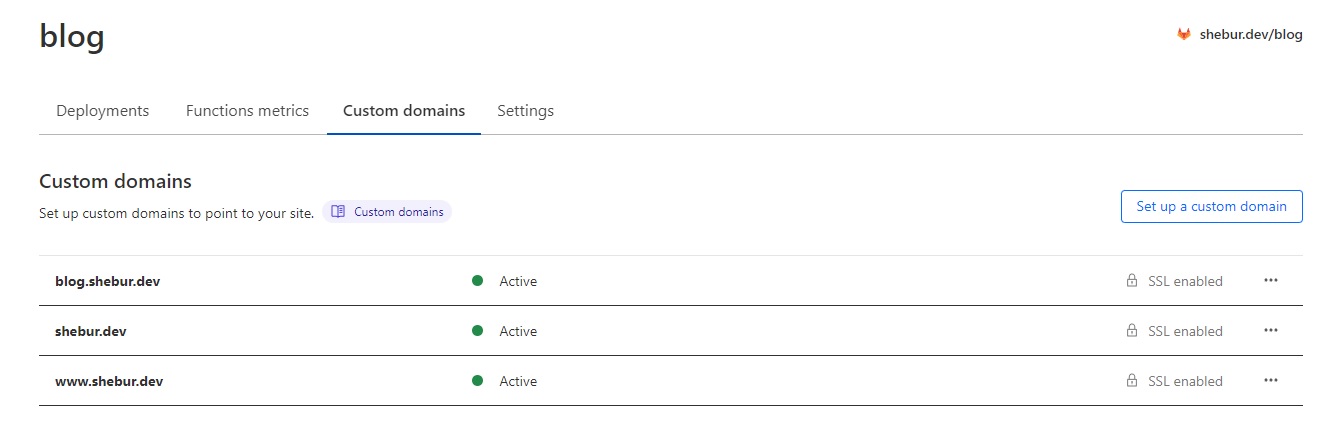
Finally, you’ll need to configure your domain to point to your Cloudflare Pages site. Go to the page project Custom Domains setting. And add desired domain names.
Conclusion Link to heading
And that’s it! Your Hugo website is now deployed to Cloudflare Pages and is ready to be accessed by your visitors.
Process of adding of new posts is as simple as:
- add new content/posts/some-name.md file
- write content in that new file using Markdown
- commit and push changes to git
And that is all. In several seconds or minutes (if you have some heavy resources) blog site will be updated and redeployed.