Now you have already a set of services, available on homelab on different domain names and/or ports. More you add, more difficult it becomes to remember what and where located.
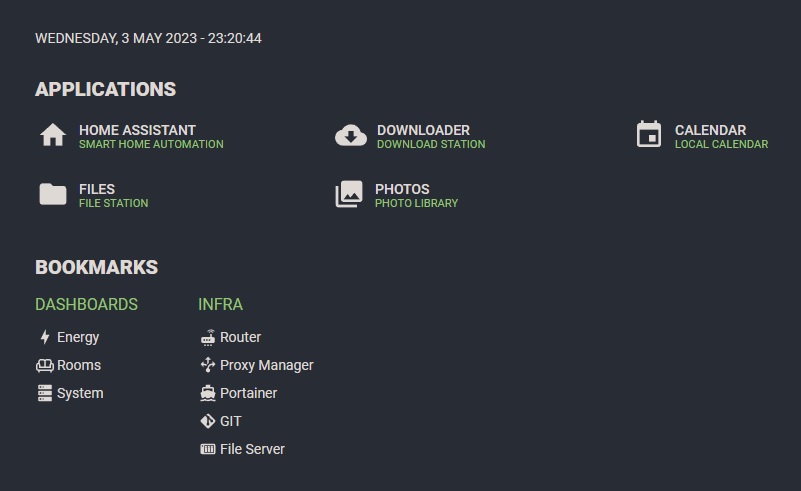
I solved it by adding a separate service, working as a catalog page or dashboard. After trying several solution, stopped on Flame.
Prerequisites Link to heading
- Raspberry Pi 4 setup and updated
- Portainer installed
- Nginx Proxy Manager service installed
Step 0 - Define local mount folders Link to heading
Service will use local folders, mounted to docker container, to store its data.
For service we will need to create folder:
- /ssd/flame/data
mkdir -p /ssd/flame/data
Step 1 - Install Flame dashboard Link to heading
With Portainer installed, it is possible to start new stack. To do this, follow these steps:
- Open Portainer in your web browser and navigate to the “Stacks” page
- Click the “Add stack” button
- Enter a name for the stack (e.g., “catalog”) and paste the following code into the “Web editor” section:
version: '3'

networks:
  intranet:
    external: true

services:
  flame:
    image: pawelmalak/flame:multiarch2.3.0
    volumes:
      - /ssd/flame/data:/app/data
      - /var/run/docker.sock:/var/run/docker.sock
    ports:
      - "5005:5005"
    networks:
      intranet:
        aliases:
          - catalog
    environment:
      - PASSWORD=mysuperpwd
    restart: unless-stopped
Step 2 - Configure Link to heading
Once the Flame stack is running, you can access the web interface by navigating to http://<homelab>:5005.
You can start adding Bookmarks and Applications into it, listing services you have on homelab.
Step 3 - Configure Proxy Link to heading
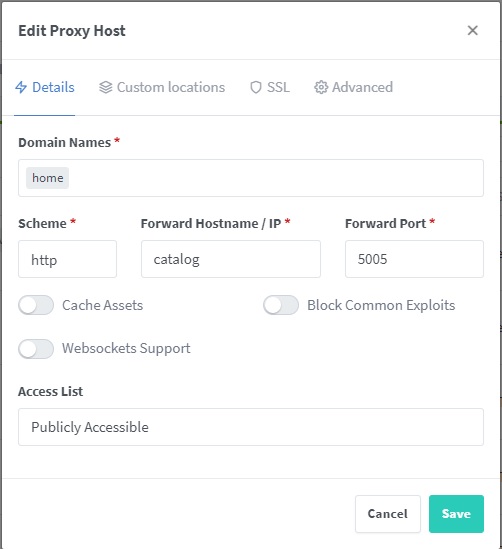
Add a proxy host to make this dashboard available on http://home (or whatever dns name you use for you homelab server):
- Add new Proxied Host
- Fill required information
- Domain names:
home - Forward hostname:
catalog - Forward port:
5005
- Domain names:
TO BE CONTINUED… Link to heading
And that’s it! You now have HomeAssistant running on your homelab. Now you can proceed with connecting IoT devices, logging and monitoring them.
In the following post Homelab. Backups, I will describe how to create periodic backups with rsync.